Add a Scheduler
Adding a Scheduler
Note: The following instructions explain how to add a scheduler activity.
1. Click Turn editing on at the top right hand side or from course settings.
2. Go to the relevant section where you want the scheduler to be available.
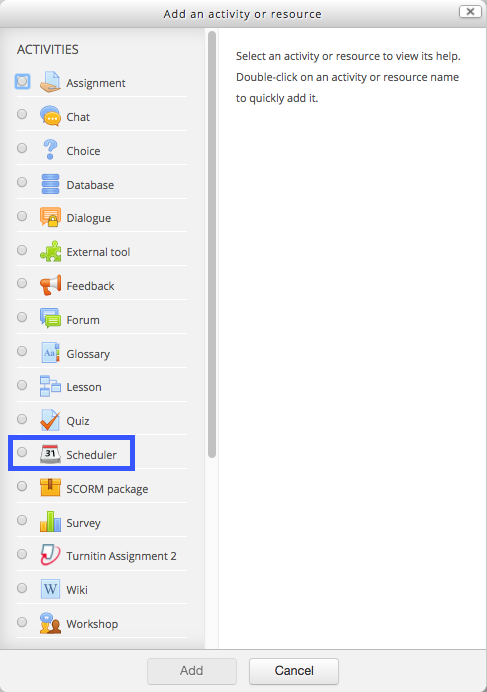
3. Select Add an activity or resource. From the list, select Scheduler and then click Add.
Configuring a Scheduler
4. Choose a Name for your Scheduler.
5. Enter any relevant details/instructions in the Introduction box.
6. Enter a Role name of the teacher. Role name is a label that appears at the top of the appointment list table. This is an optional field which you may leave blank.
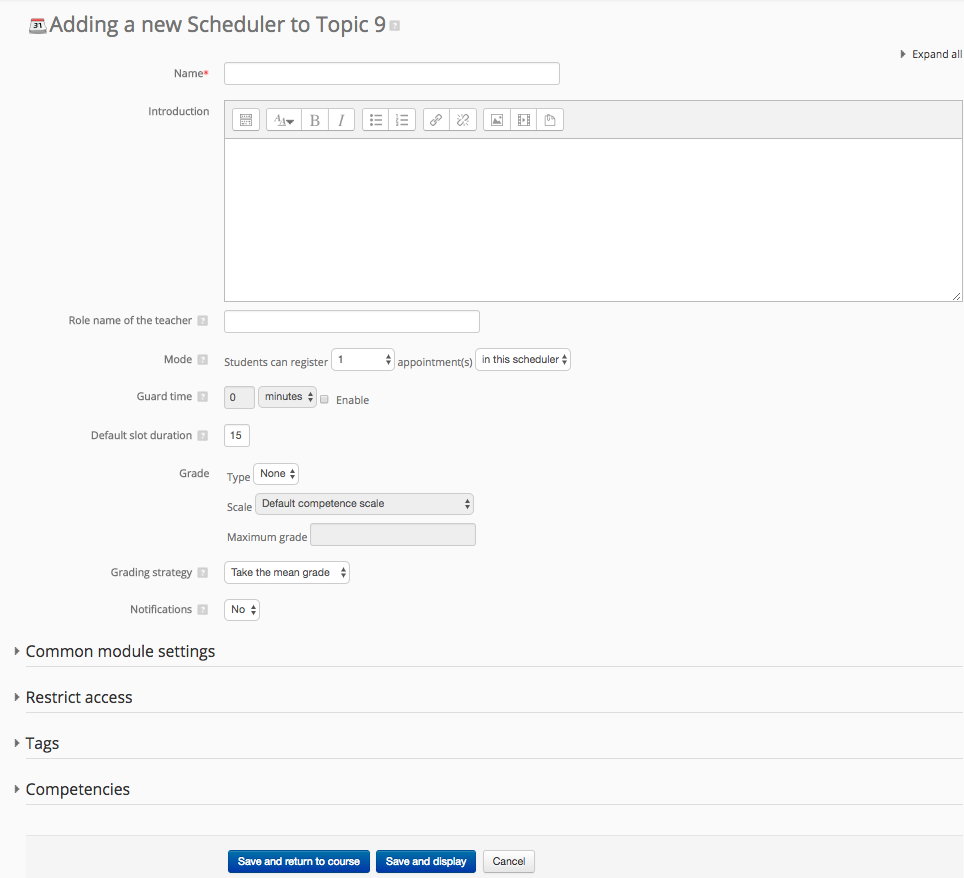
7. Select Mode preference for the Scheduler.
- "n appointments in this scheduler": The student can only book a fixed number of appointments in this activity. Even if the teacher marks them as "seen", they will not be allowed to book further meetings. The only way to reset ability of a student to book is to delete the old "seen" records.
- "n appointments at a time": The student can book a fixed number of appointments. Once the meeting is over and the teacher has marked the student as "seen", the student can book further appointments. However the student is limited to n "open" (unseen) slots at any given time.
8. Enable and Set Guard time to 24 hours/1 day. A guard time prevents students from changing their booking shortly before the appointment.
9. Enter a number in minutes for the duration of the appointments in the Default slot duration. Note that you can customize individual slots once they have been created.
10. Leave Grade and Grading Strategy to default unless you plan to assign a grade.
11. Select yes from the Notifications drop-down if you would like email notifications and reminders to be sent to both students and instructors.
12. Leave Common module settings, Restrict access, Tags and Competencies settings to default.
13. Click Save and Display to view the activity.
14. Once the Scheduler has been created and the initial settings have been configured, you can begin adding slots for which students will be able to sign up. You can either add a single slot or multiple slots at a time that repeat every week on the same day and times.
Add Single Slot
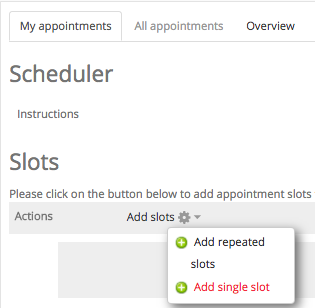
15. From Add slots drop-down menu, select Add single slot on the My appointments tab.
16. Select the Date and time of the appointment.
17. Enter the Duration of the slot in minutes.
18. Enable Ignore scheduling conflicts by ticking the box next to it.
19. Select the number of students allowed to sign up for a single appointment at a time from the Allow multiple students per slot drop-down.
20. Enter the Location of the appointment.
21. Assign the Teacher who will be holding the session.
22. Select when you want to Display appointments to student from the drop-down list.
23. Enable and select when you want the Email reminder to be sent to students for the appointment.
24. Click Save changes to complete the process of adding the slots.

Add Repeated Slots
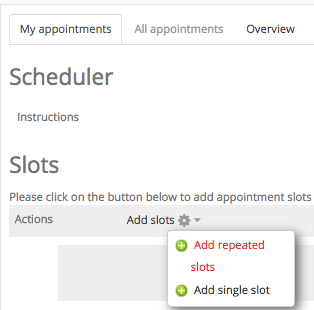
25. From Add slots drop-down menu, select Add repeated slots on the My appointments tab.
26. Select the start Date of the first appointment slot.
27. Enable and select the last date of the appointment from Repeat time slots until drop-down list.
28. Select the days on which slots will be created from the Add appointments on list.
29. Set the start and end time of the slots.
30. Set Divide into slots to yes if you want the start and end time to be divided into equal time slots.
31. Enter the Duration of the slot in minutes.
32. Set Break between slots to 0 minutes and No for Force when overlap.
33. Select the number of students allowed to sign up for a single appointment at a time from the Allow multiple students per slot drop-down.
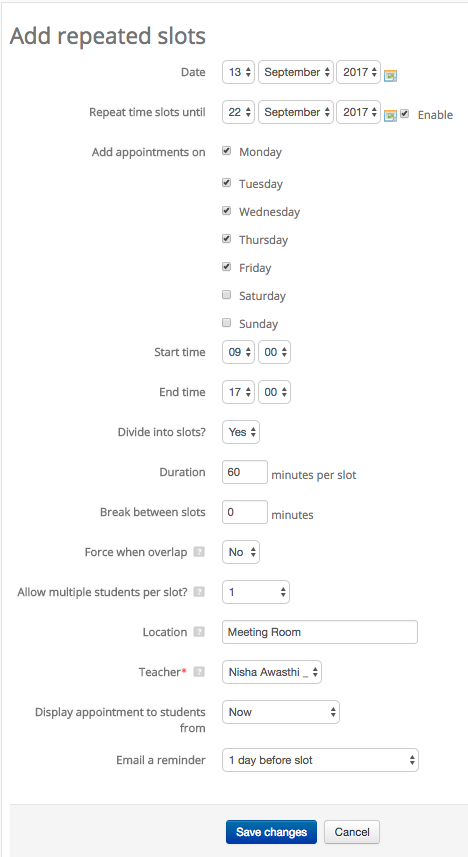
35. Assign the Teacher who will be holding the session.
36. Select when you want to Display appointments to student from the drop-down list.
37. Select when you want the Email reminder to be sent to students for the appointment.
38. Click Save changes to complete the process of adding the slots.