Manage Sections within Learning Portal
Add a section
- Turn on the editing on the upper right-hand side of the course page.
- Scroll all the way down to the course page and locate the plus/minus icon
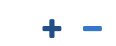
- Click on the Plus icon to add topic sections accordingly.
Delete a section
- Turn on the editing on the upper right-hand side of the course page.
- Click ‘Edit’ to the right of the topic name that you wish to delete.

- Click ‘Delete section’ from the drop-down list.
Hide or Show a section
- Turn on the editing on the upper right-hand side of the course page.
- Click ‘Edit’ to the right of the topic name that you wish to hide/unhide.
- To hide a section - click ‘Hide section’ from the drop-down list.

- To show a section - click ‘Show section’ from the drop-down list.

Rename a section
- Turn on the editing on the upper right-hand side of the course page.
- Click the (pencil) edit icon
 to the right of the name of the section that you want to edit.
- Edit the text in the text box.
- Press enter to save the changes.
to the right of the name of the section that you want to edit.Move a section
- Turn on the editing on the upper right-hand side of the course page.
- Click and drag the move icon
 at the top left of the section. As you drag over other sections they will dim.
 - Release the mouse to drop the section into a new location.
Last modified: Friday, 14 May 2021, 12:03 PM