Add a File
Uploading a File
Note: The following instructions explain how to upload and display a single file in a section of your course.
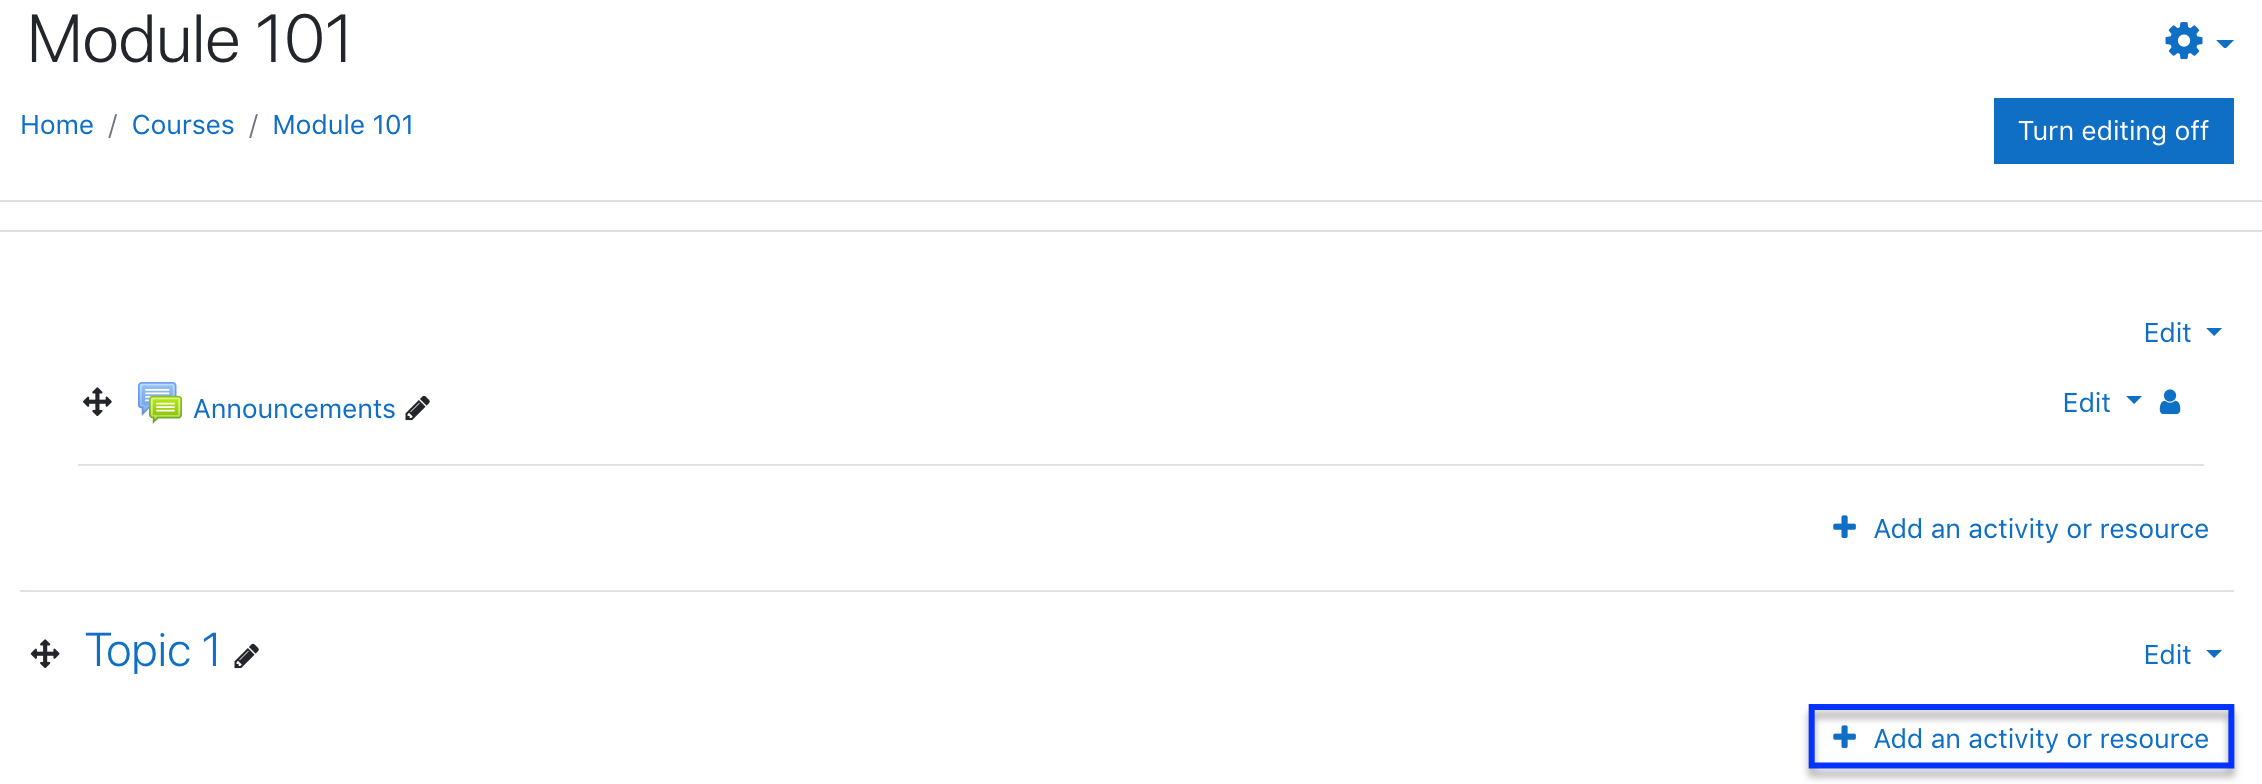
1. Turn on the editing on the upper right-hand side.
2. Go to the relevant section where you want the file to be available.
3. Select Add an activity or resource.
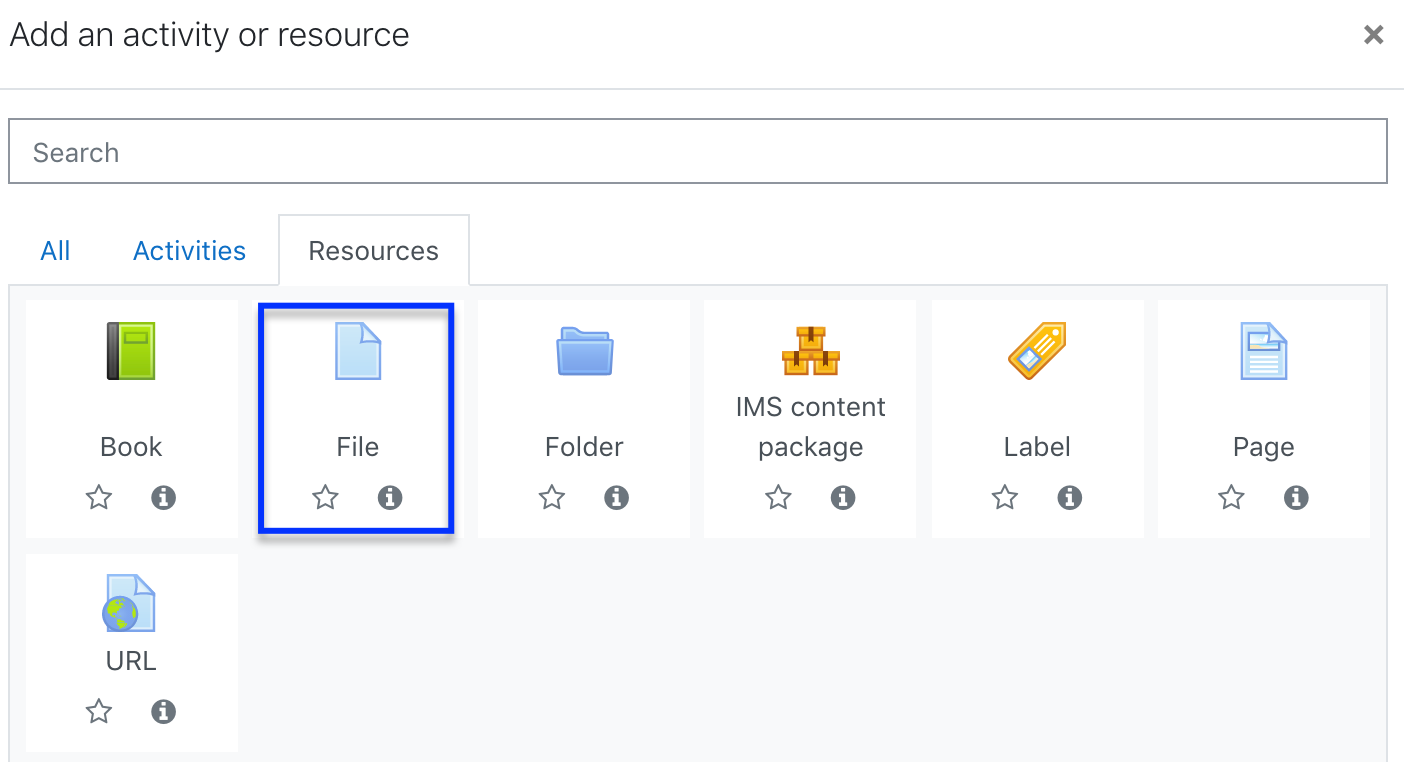
4. From the resource list, select File to load the Adding a new File screen.
5. Choose a name and a description for your file.
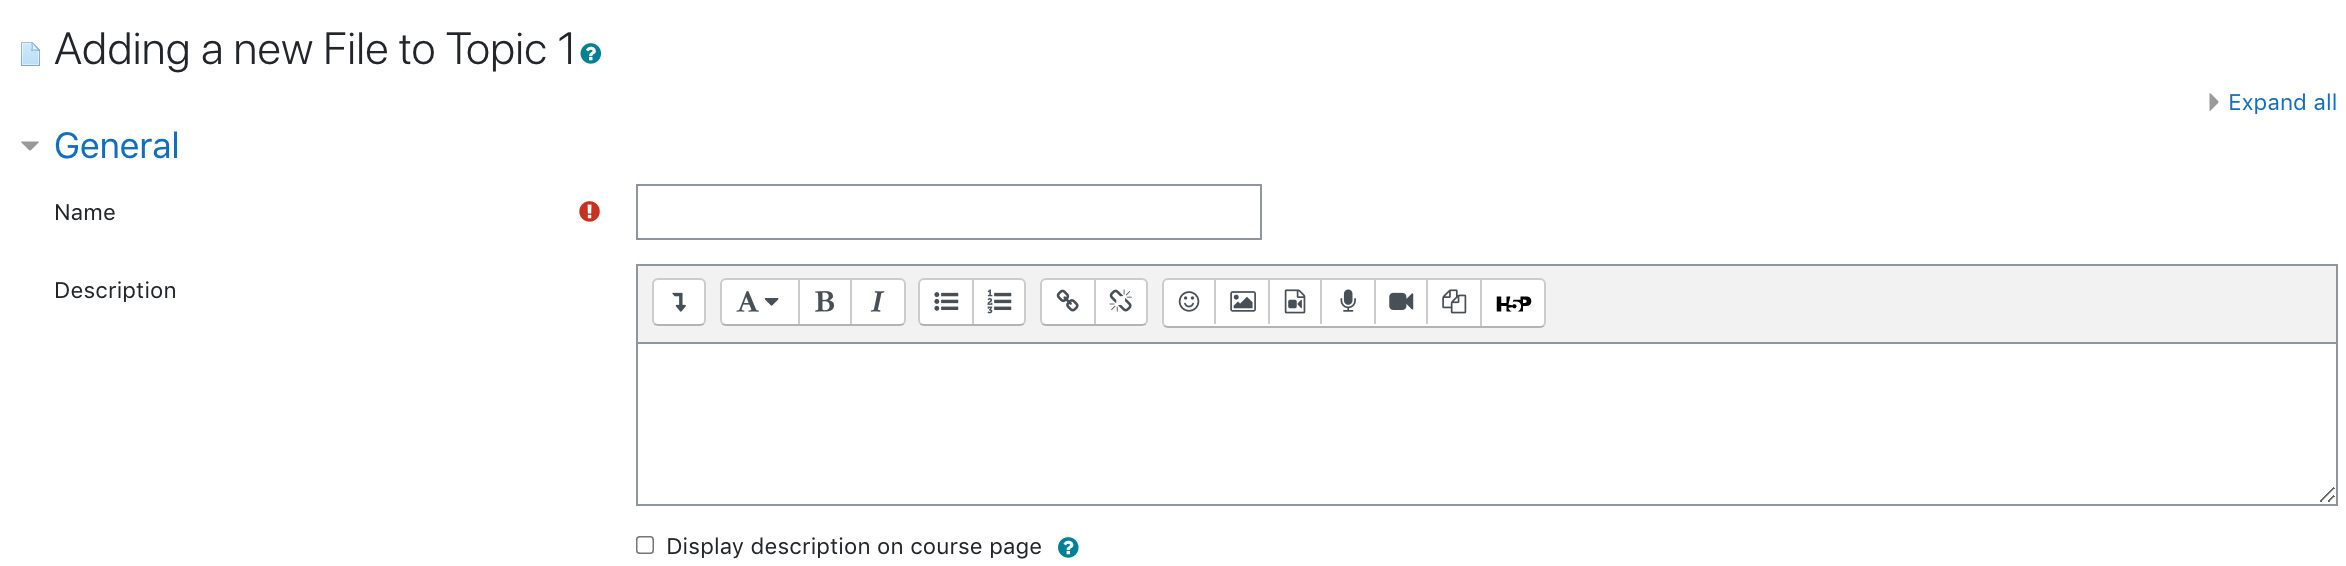
6. Select the file icon; this loads the File Picker. Or you may drag your file to the arrow.

7. From the File picker window, click Upload a file.
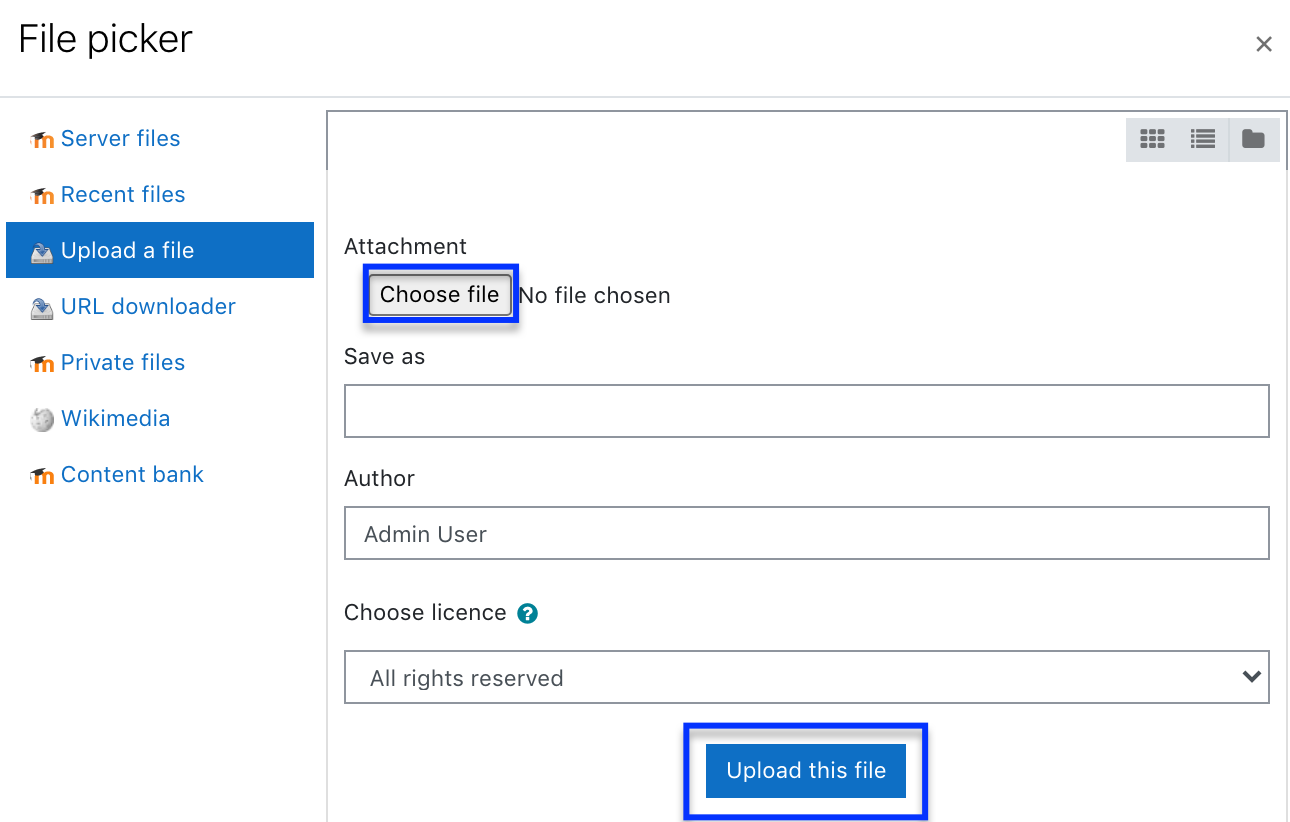
8. Click Choose file to browse your computer and select the file that you want to attach, and then click Choose. You will return to the File Picker window where you should see the file name next to the Choose file button.
9. Click Upload this file. The File picker window will close and your file will be listed on the Adding a new File screen.
10. Click Save and return to course.
11. A link to your file should appear in place.